|
How to Connect a Bot to Instagram |
|
Keeping up with social media and keeping your online community engaged can be a time consuming task. Through Bot Libre you can now automate your Instagram presence with your own Instagram bot. Any Bot Libre bot can be connected to an Instagram account via a Facebook page account. The bot will reply to your users questions in real-time using the responses of script you have trained your bot with. Connecting a bot to Instagram a bit of a process, as Facebook requires a lot of permissions and validation to be setup to allow a bot on their platform. This "how to" give you a step by step process to connecting your bot to Instagram. Step 1 - Create a Facebook Page for your bot. After you have logged in to your Facebook account, you can create a page by clicking on "Create" on the top right menu and selecting "Page".
Enter a page name, category and description, and click on "Create Page". Then, fill out the details of your page:
Step 2 - Create an Instagram Business/Professional Account Use a mobile device to create an instagram account. Then, follow the steps as below: Go to your account in Instagram and click "Edit Profile" and fill out your details if you haven't done already. Then, click on the three horizontal bars on the right to go to settings:
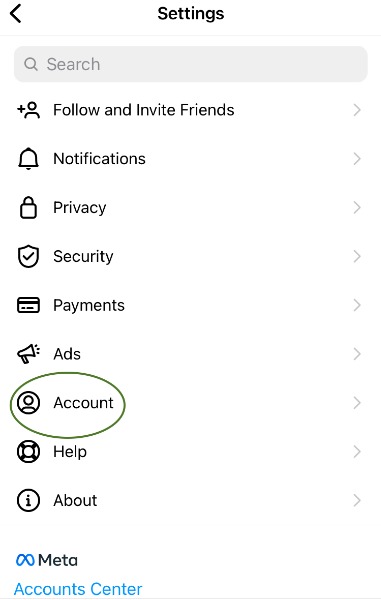
Then, go to settings and tap on account:
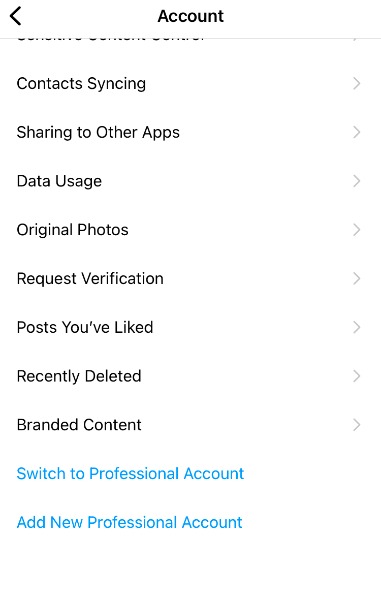
Scroll below and tap on "Switch to Professional Account":
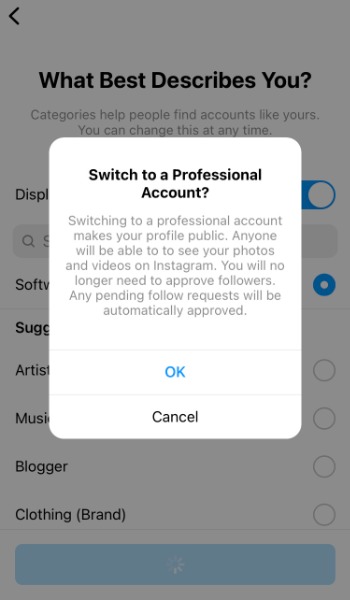
Then click on continue and select the type of business you operate, and click done. If your account is set to private, you may receive a popup like this:
Click on Ok to convert your account to public, and that should complete the process of creating a Instagram Professional account. Step 3 - Connect your Instagram Business/Professional Account to a Facebook Page Instagram accounts are managed through Facebook Pages, so you must connect your Facebook page to your Instagram account. Go to your Facebook Page, and click on settings on the left menu:
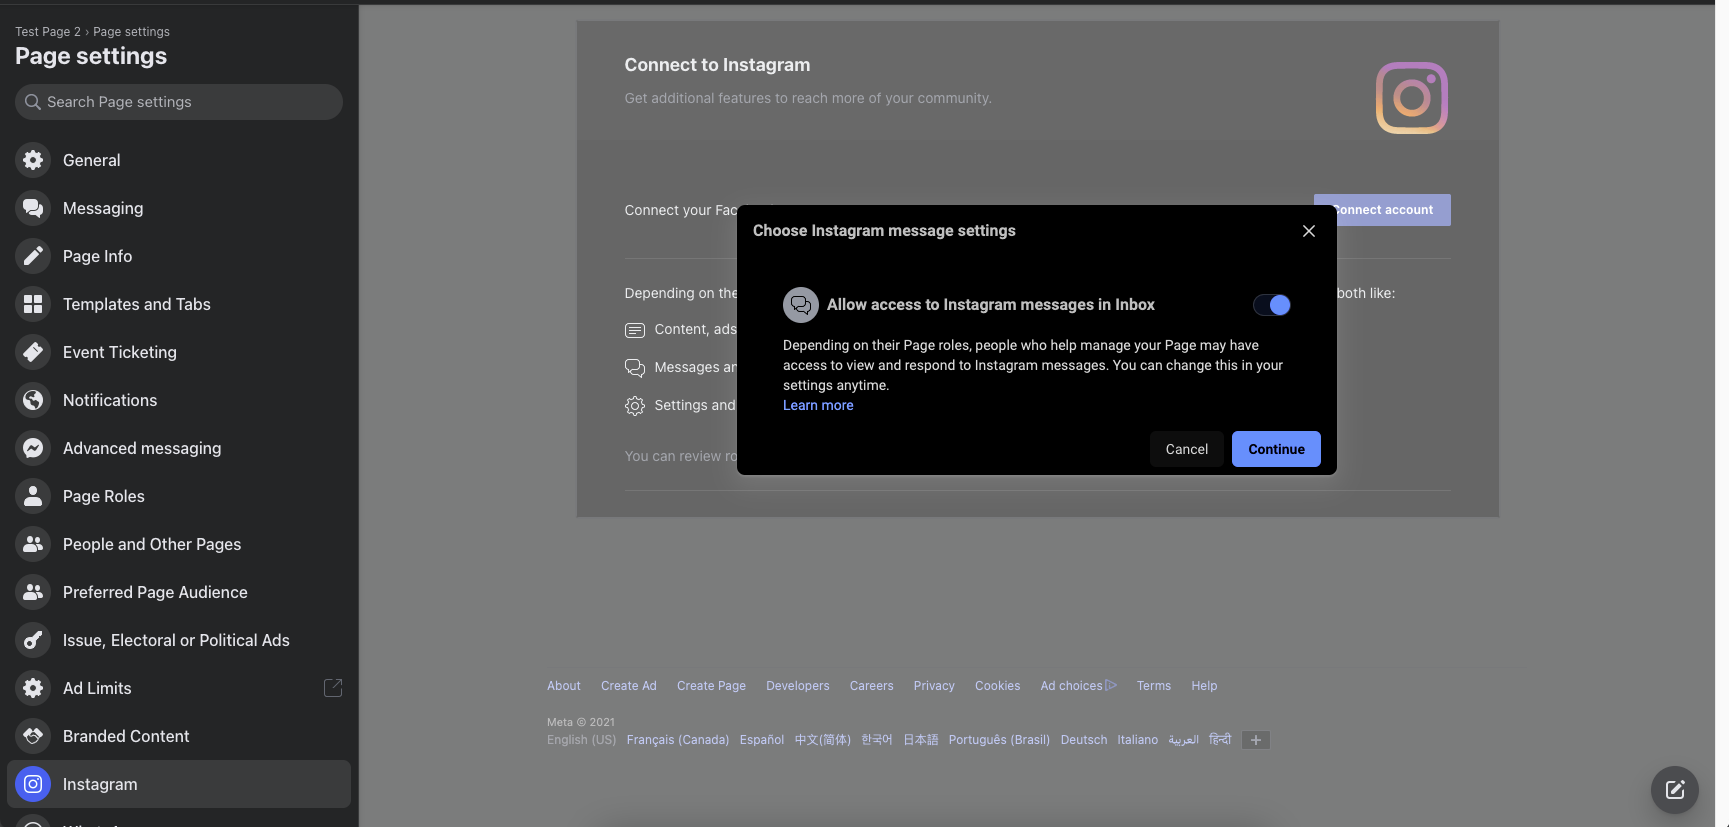
Then click on the Instagram tab from the left menu bar again, and click on Connect Account from the Connect Instagram page:
Now click on continue with messaging enabled:
Now it will take you to Instagram login page. Enter your instagram username and password, or if already logged in, click continue this will connect your Instagram account to your Facebook page. Step 4 - Create a Facebook App for your Bot Go to http://developers.facebook.com and click on 'My apps':
From there, click on "Create App", leading you to this page:
From here select Business and click on Next:
Add the details for your business and click on Create App. Then, go to the app dashboard:
From here, scroll below to add the following products to your app: Facebook Login, Instagram Graph API, Messenger, Webhooks:
Now click on Settings for the Facebook Login Feature:
From here, make sure "Client OAuth Login", "Web OAuth Login", "Embedded Browser OAuth Login" are set to Yes. For the Valid Oauth Redirect URIs enter the following values: "https://www.botlibre.com/instagram" and "https://www.botlibre.com/facebook" followed by spaces, and click on Save Settings. Next, click on Settings > Basic from the left menu. You should see a page similar to this:
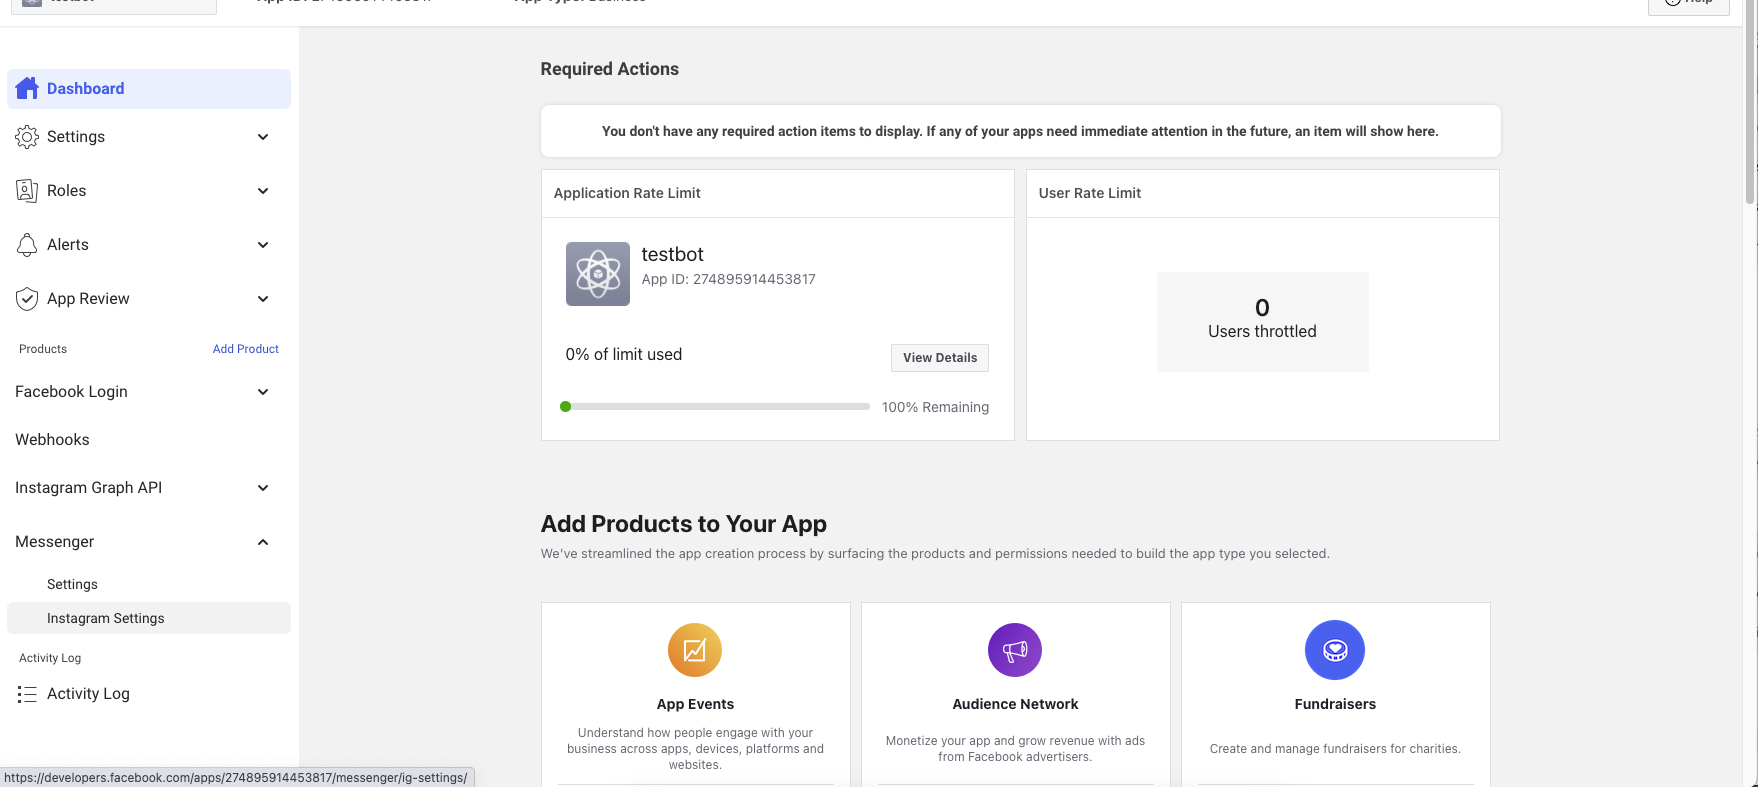
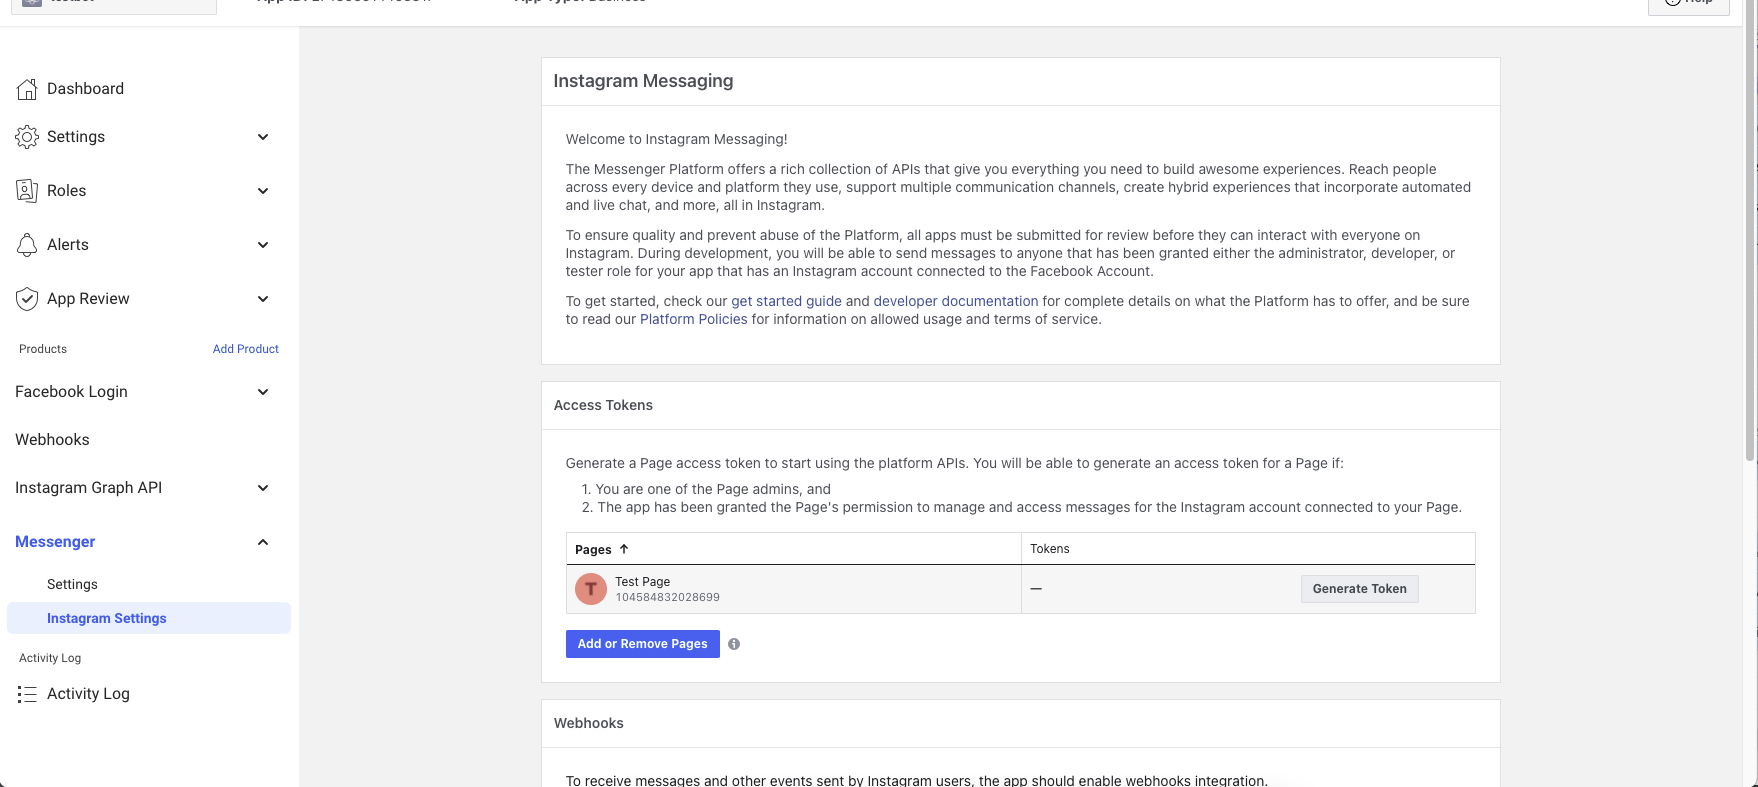
From here, copy your App ID and click on Show to show your App Secret, and copy it. Save your App ID and App Secret somewhere safe. Enter the app domain "www.botlibre.com" and for the Privacy Policy and Terms of Service, add the links to your website containing those pages. You might need to create a Privacy policy and Terms of Service if you do not have one already. Step 5 - Get a Page Access Token for your Facebook page connected with the Instagram Account From the previous step, you should have set up Messenger for your Facebook App. Now from the left menu, click on Messenger > Instagram settings:
In the Instagram Messaging section, your page should be added in the section for "Access Tokens". If not, you can click on "Add or Remove Pages" and select the page you want to connect with your Instagram Account.
Then, click on "I understand", and then "show" to show your token:
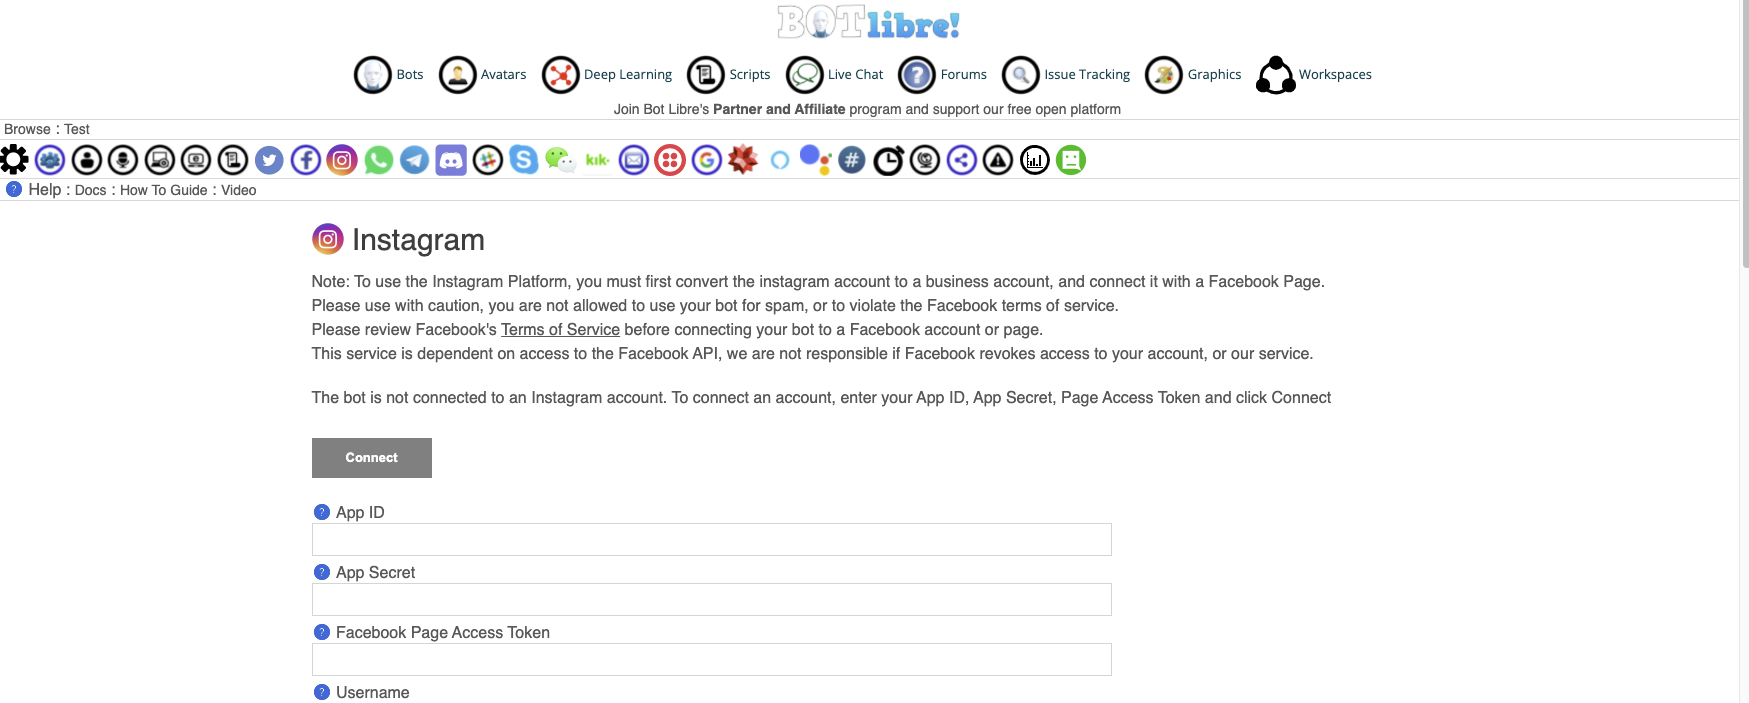
Click on copy to copy your token. You will need this token later on, and you can see this token only while generating it so you will need to save it somewhere safe. Step 6 - Create a bot Next, you will need to create a bot to connect with your Facebook Page and App. You can follow the instructions here to create your bot: How to create your own chat bot in 10 clicks Step 7 - Connect bot with Instagram From the Bot Libre website, browse to your bot. Go to the Admin Console by clicking on the gear icon at the bottom. Then click on Instagram Tab. This will bring you to this page:
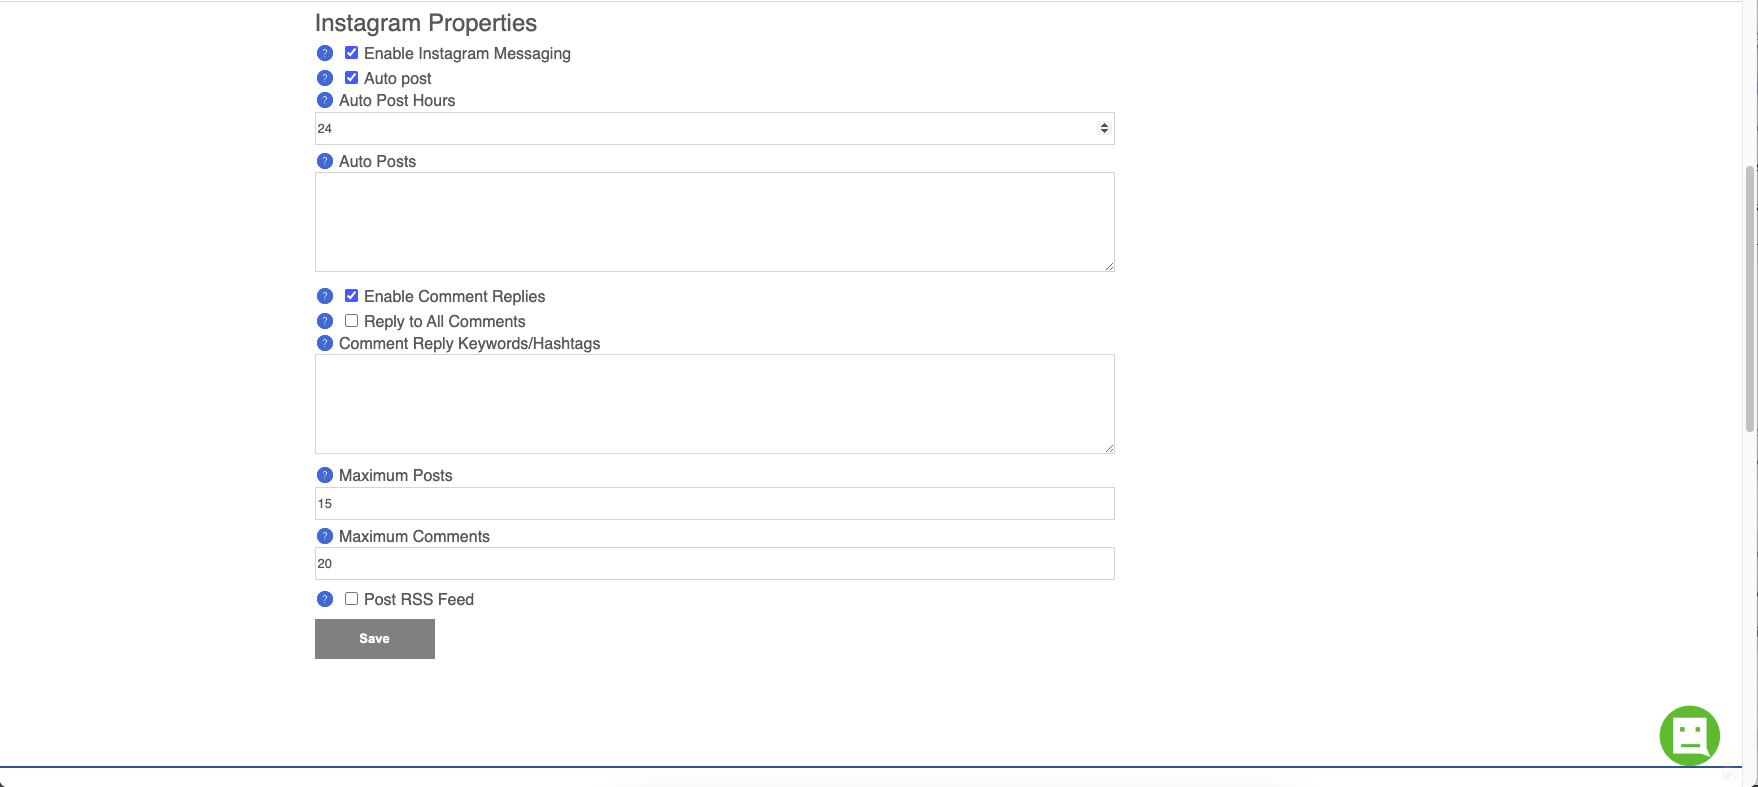
You should have you Facebook App ID, App Secret and the Facebook Page Access Token from the earlier steps. Enter each of these in the appropriate fields and click on Connect. You do not need to enter the Username or Access Token fields, as these will be filled automatically. Copy and save the Webhook Callback URL as you will need this later. Grant all the necessary permissions and select the page you want to connect with the bot. If your connection is successful, you should be able to scroll down and set the properties:
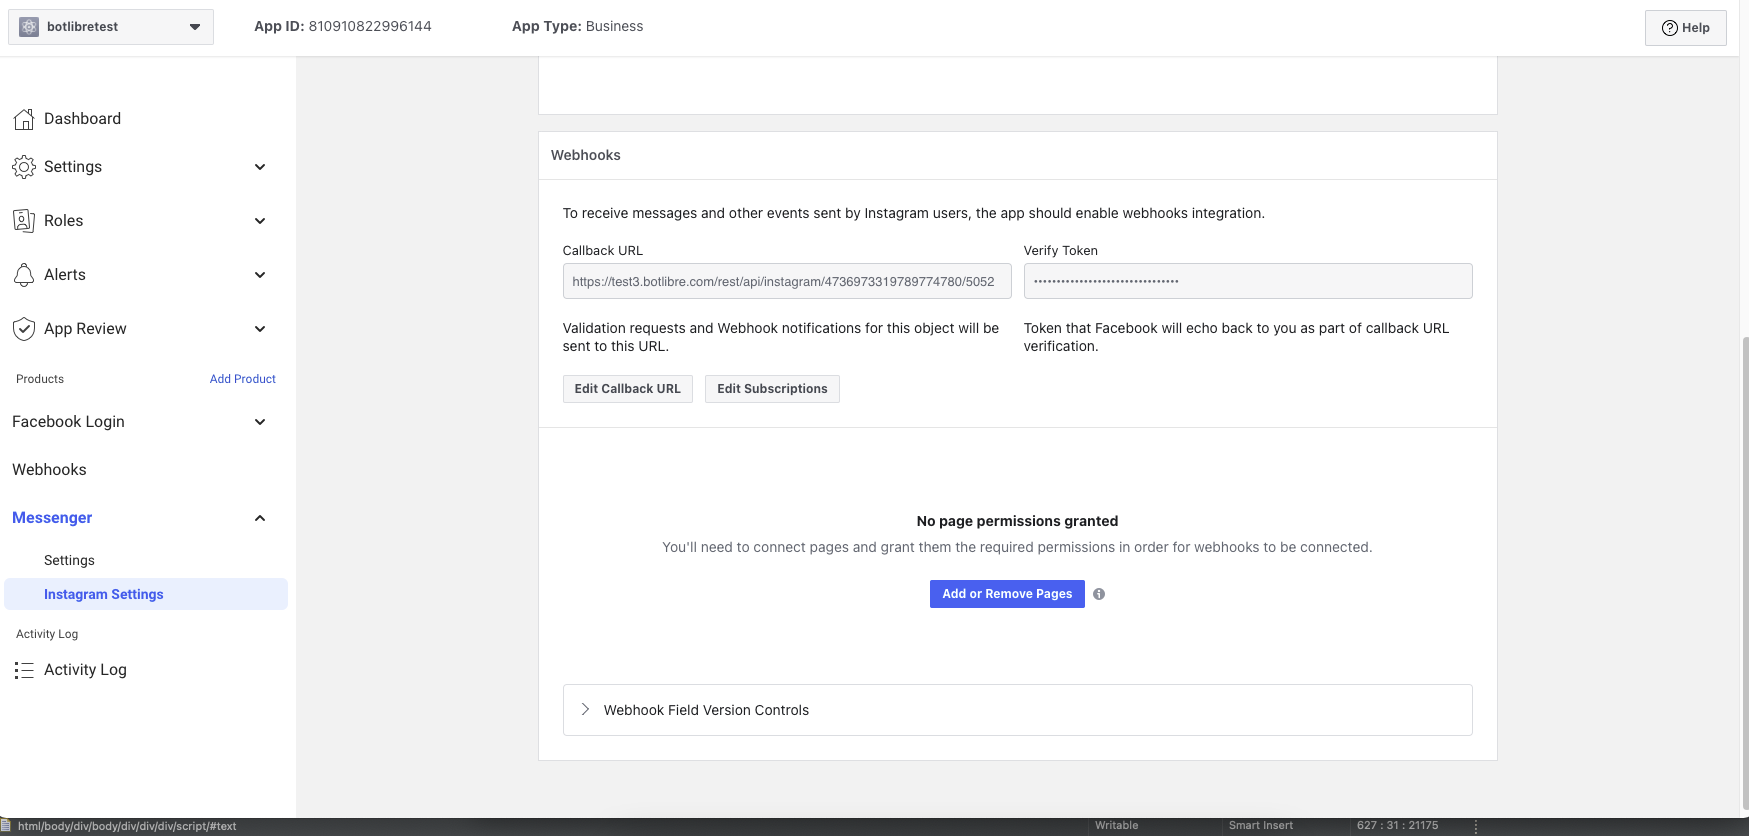
Step 8 - Set up a Webhook URL with Instagram for real time messages From the Instagram bot settings page, scroll up and copy the Webhook Callback URL. Then, go to your Facebook App page and click on Messenger > Instagram Settings on the left menu. Then, scroll below to the webhooks section and click on "Add Callback URL":
In the Callback URL paste the Webhook Callback URL you copied from the bot page earlier, and in the Verify token, place "token", and click on "Verify and Save". If successful, the webhook will be added to your Facebook app:
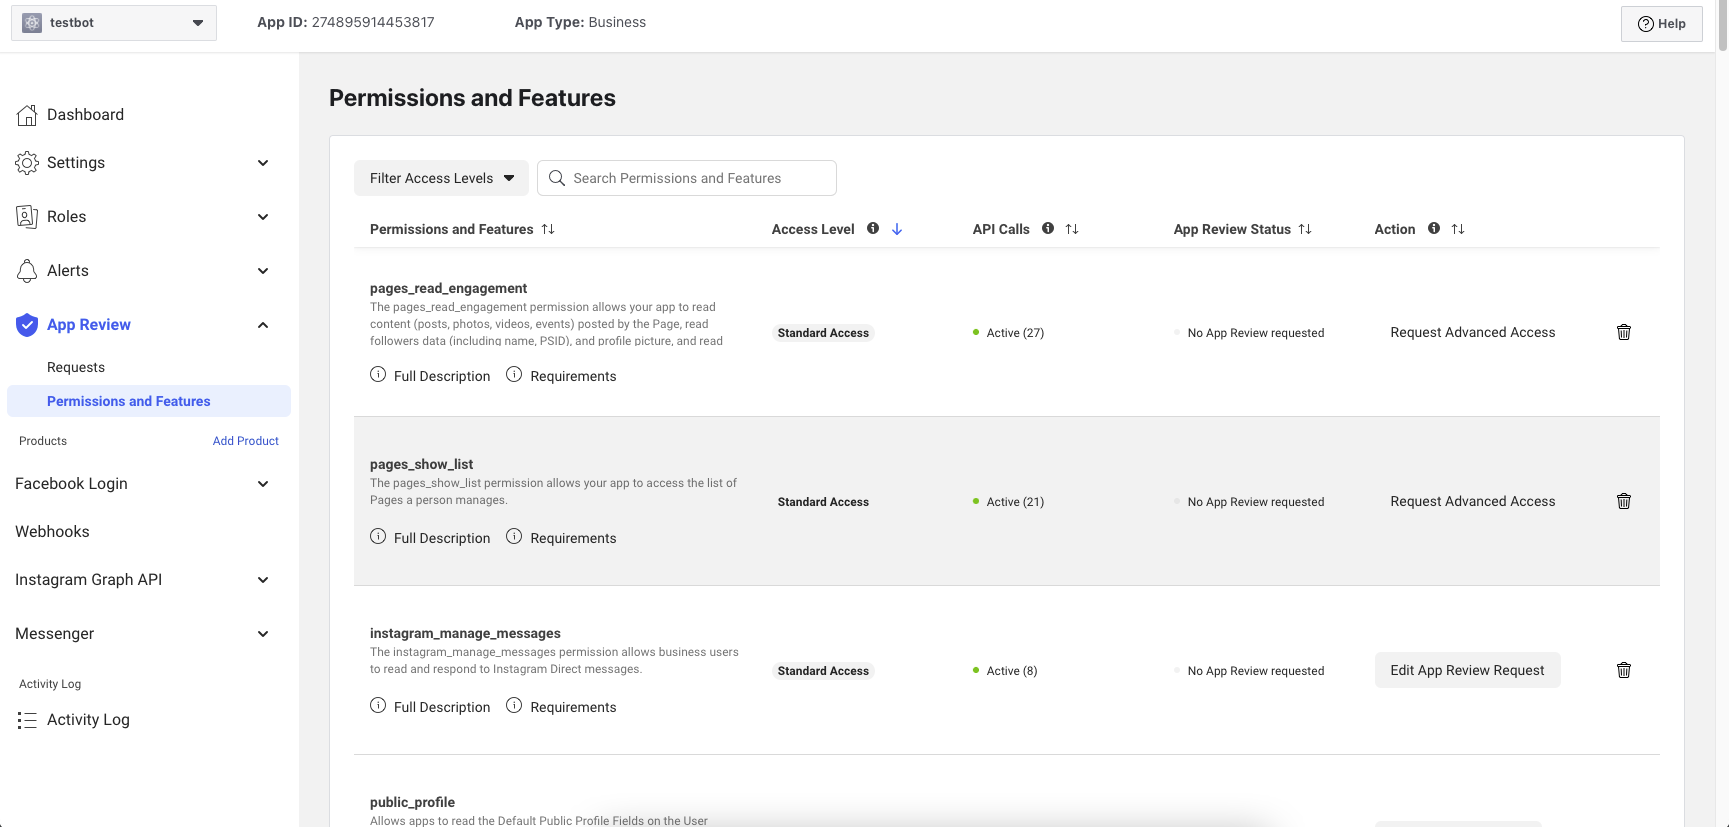
From here, click on "Edit Subscriptions" and check the following boxes: "messages", "messaging_postbacks", "message_reactions", "messaging_seen", "messaging_handover", and click Save: The webhook should now be added to your bot and ready to received and send messages. Step 9 - Approval by Facebook At this point, you or any any authorized user who has a role of "App Developer" or "Owner" in your Facebook App and has a Facebook Account connected to their Instagram account should be able to send messages to your bot's Instagram Account with , and your bot will respond. For regular Instagram users who do not have a role in your app to be able to send and receive messages with your bot, you will need to have your Facebook App approved by Facebook. Return to the Messenger Settings page on the Facebook Developer website and scroll to the 'App Review section.
Each of these permissions will need advanced access and must be reviewed by Facebook in order for your Instagram bot to interact with the general public. To request advanced access, click on "Request Advanced Access" on all of these permissions. To get verified, your app must comply with the Facebook terms and conditions. You might also need to verify your identity as either and individual or a business from the Settings > Basic Tab. Click on Start Verification to start the verification process.
If you got this far, congratulations, you have now connected your bot to Instagram. Now you can train your bot's responses and review its conversations from its "Training & Chat Logs" page in its Admin Console. If you encountered any issues, or would like our help setting up your bot please email us at [email protected] or upgrade to our Platinum service and we can build your bot for you. |
|
|
|
|
|
|